Register ThingsNode at TTN
With your newly-acquired EUI, you can now register your device at The Things Network (TTN) and then configure the ThingsNode to communicate through your gateway (or someone else’s, as long as it’s connected to TTN).
Before you can add a device to TTN, you need to have an application to which to add the device. This is totally unrelated to a gateway; your devices can send messages to your “application” through any TTN-connected gateway, not just yours, and your gateway could transit LoRaWAN packets for any other TTN application.
Add a TTN application
Go to your TTN console and choose “Applications”, then hit “add application”. You only need to fill in the top two fields (“Application ID” and “Description”) - note that you can’t change the application ID after you’ve made it, and (I think) it has to be unique on TTN. For this reason, I tend to prefix the application ID with my TTN username (kevin21) and postfix it with a number so I can have several similar applications.
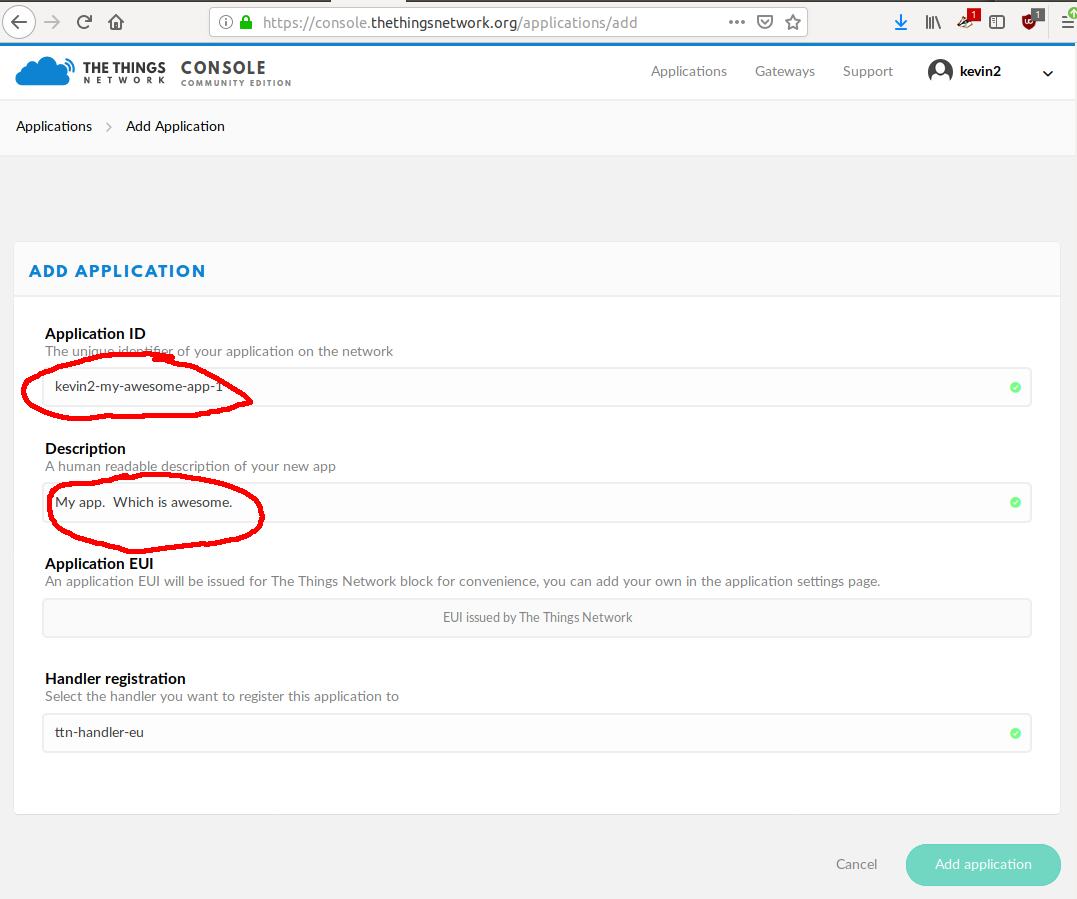
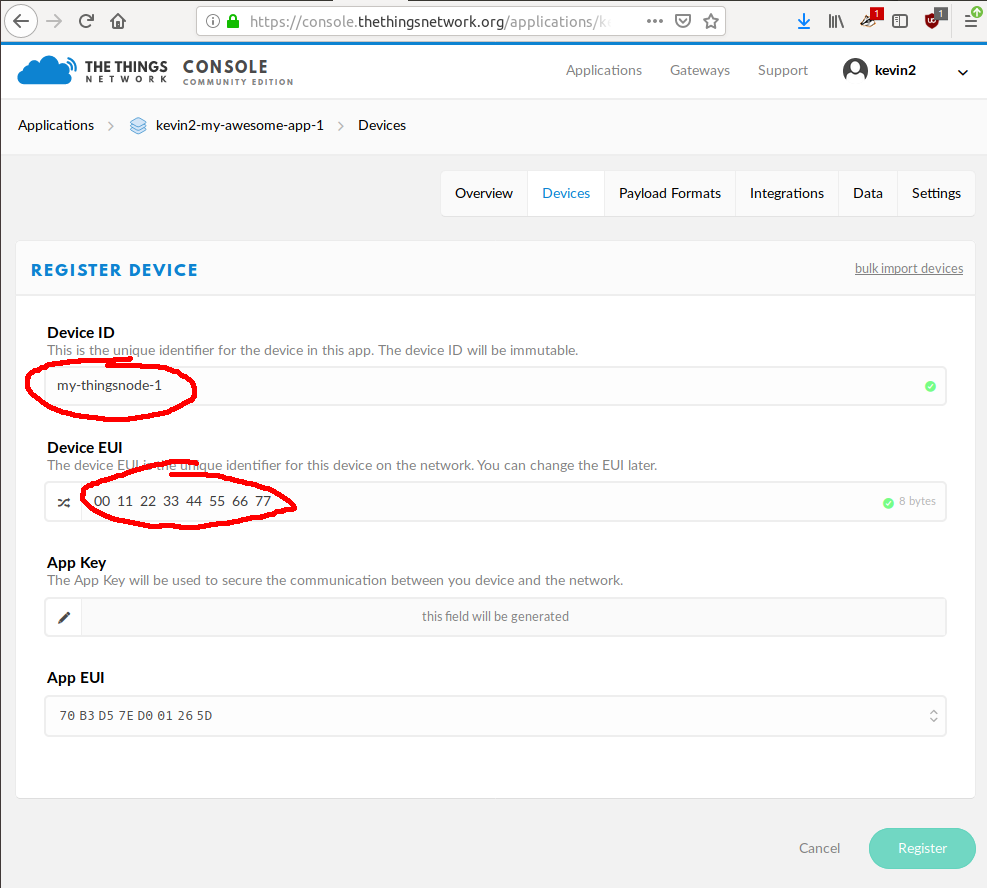
You’ll then be presented with the application’s main config screen. Scroll down a little and you’ll see a section “Devices” which should say “0 registered devices”. Here’s where you need to add the EUI of your ThingsNode. Click on “register device”, and you’ll be faced with a form very similar to the “add application” form but instead this is to add a device to your application. Note that devices cannot be registered to more than one application at a time. Make up a device ID (this time it only has to be unique within your application, so it can be anything) and paste the previously-captured EUI into the “Device EUI” field. You can ignore the “App Key” and “App EUI” fields for now.
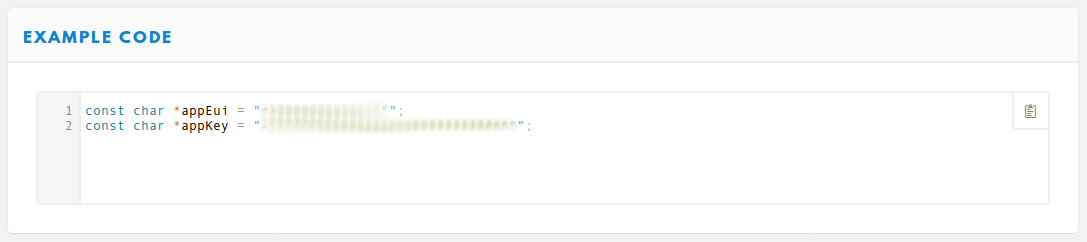
You’ll then see the device’s main config screen, with a whole set of numbers and IDs and what-not on it. Ignore them all (you can observe the “Status: never seen” field, we’ll come back to that later), and scroll down to the bottom of the page where the “example code” section is. Copy the contents of this field.
Attach your ThingsNode to your TTN application
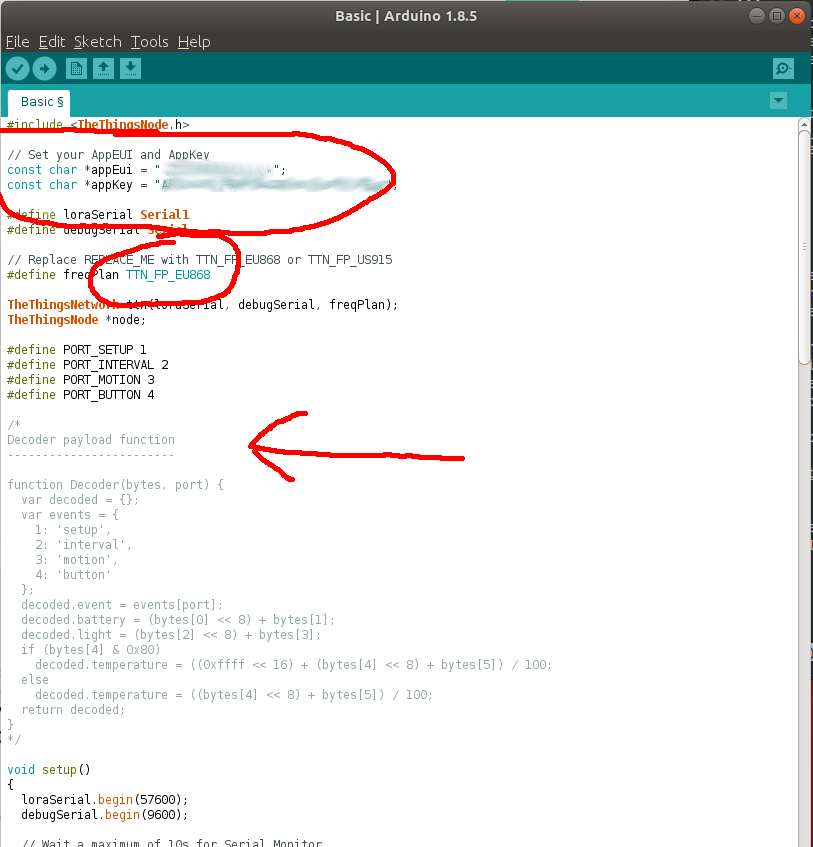
The code you copied contains the magic keys needed to authenticate your device to your TTN application, and provide some level of encryption. We need to get these keys into your ThingsNode, and get it to start sending its sensor readings to TTN. Open your Arduino IDE (with the board / processor / port options setup as per the LoRaWAN Things Nodes post. This time, though, choose the example sketch File > Examples > TheThingsNode > Basic. A couple of lines down in the code, you’ll the lines:
// Set your AppEUI and AppKey
const char *appEui = "0000000000000000";
const char *appKey = "00000000000000000000000000000000";
Replace these lines with the lines you copied from the TTN device config screen earlier. You’ll also need to replace the REPLACE_ME with the relevant frequency plan, just like we had to for the DeviceInfo sketch. Note that further down the code, there’s a comment entitled “Decoder payload function”; you’ll need this later, but for now just observe that it’s there.
Use the Upload button in the Arduino IDE, and watch the serial monitor. You should see something which looks like this:
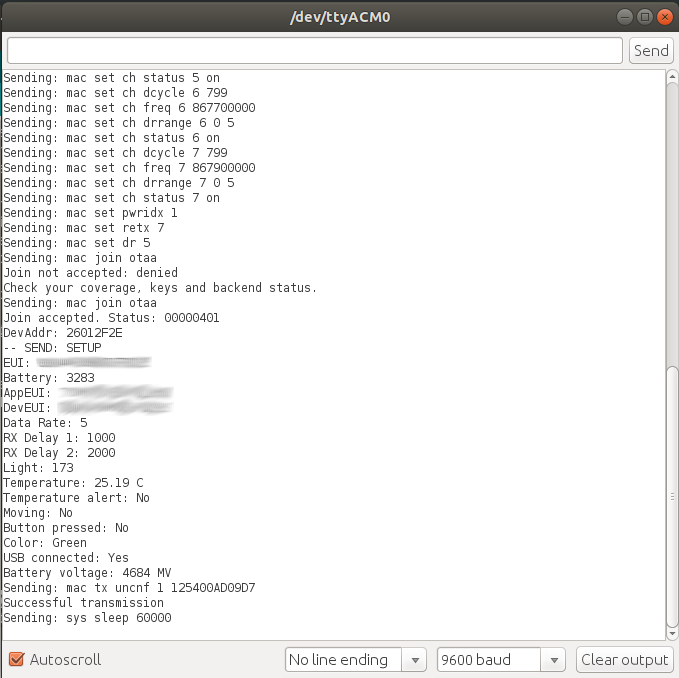
If you see the “Join accepted” message, then you can go to the device’s “Data” section of the console (you’ll need to navigate to the device via the TTN application, and then choose the “Data” tab from the top right of the screen”). On the way there, notice that the message on the device’s config “Overview” screen which previously said “Status: never seen” should now say something like “Status: 1 minute ago” to signify that your device is in communication with TTN.
Decode the LoRaWAN payload in TTN
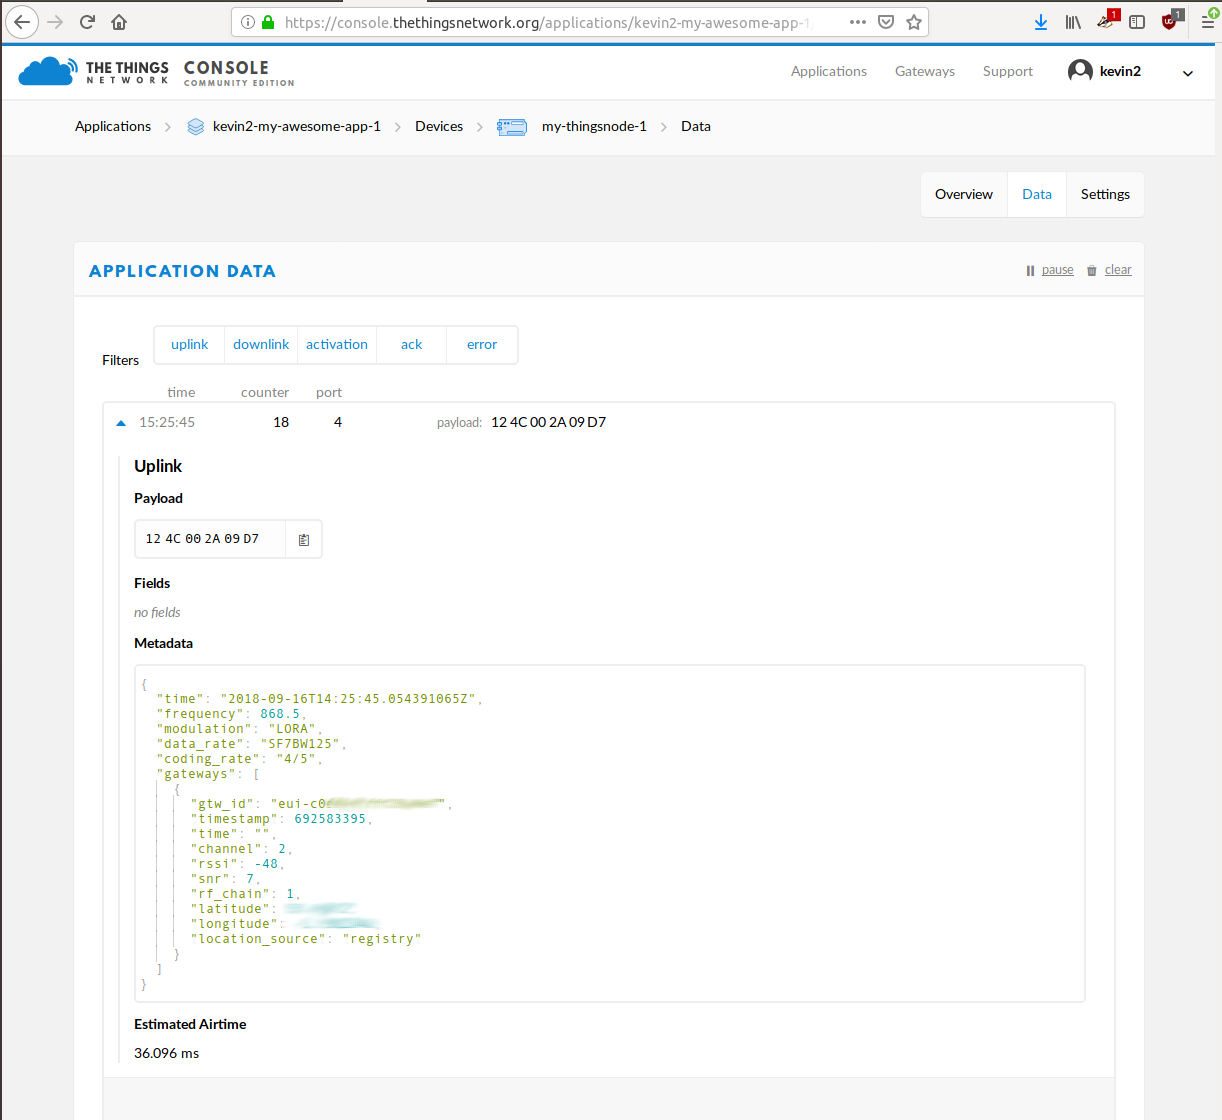
Currently, the “payload” data is just a series of bytes. Since LoRaWAN is so low power, there’s not much bandwidth available on it so each message is just a small number of bytes (in this case, 6 bytes). Also, there’s no real standard serialiser / deserialiser, so as far as TTN is concerned, it’s currently just some meaningless bytes. Not to worry, though; TTN has a way for you to embed some Javascript code to use to deserialise the payload - the standard is to turn it into a JSON object message.
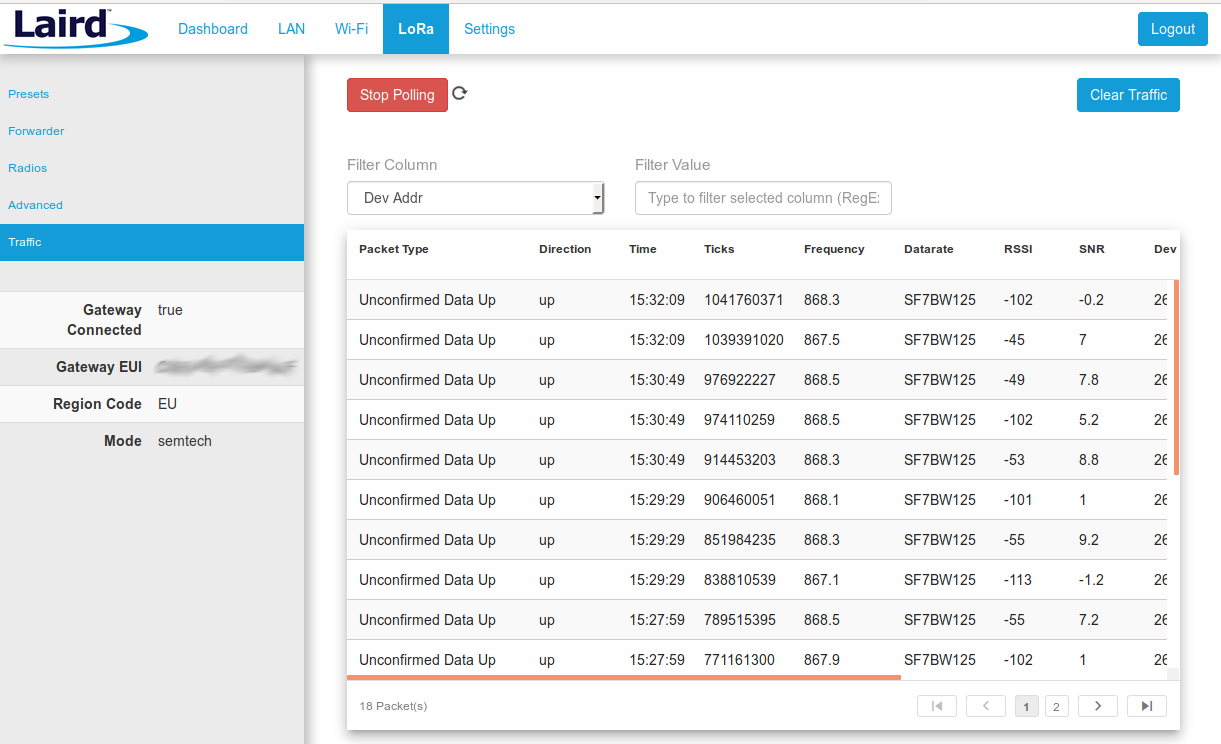
As an interesting aside, you can also see this traffic traversing the gateway. You can see this both from the local gateway’s web interface (this is from my Laird Sentrius):
… and from the TTN gateway page:
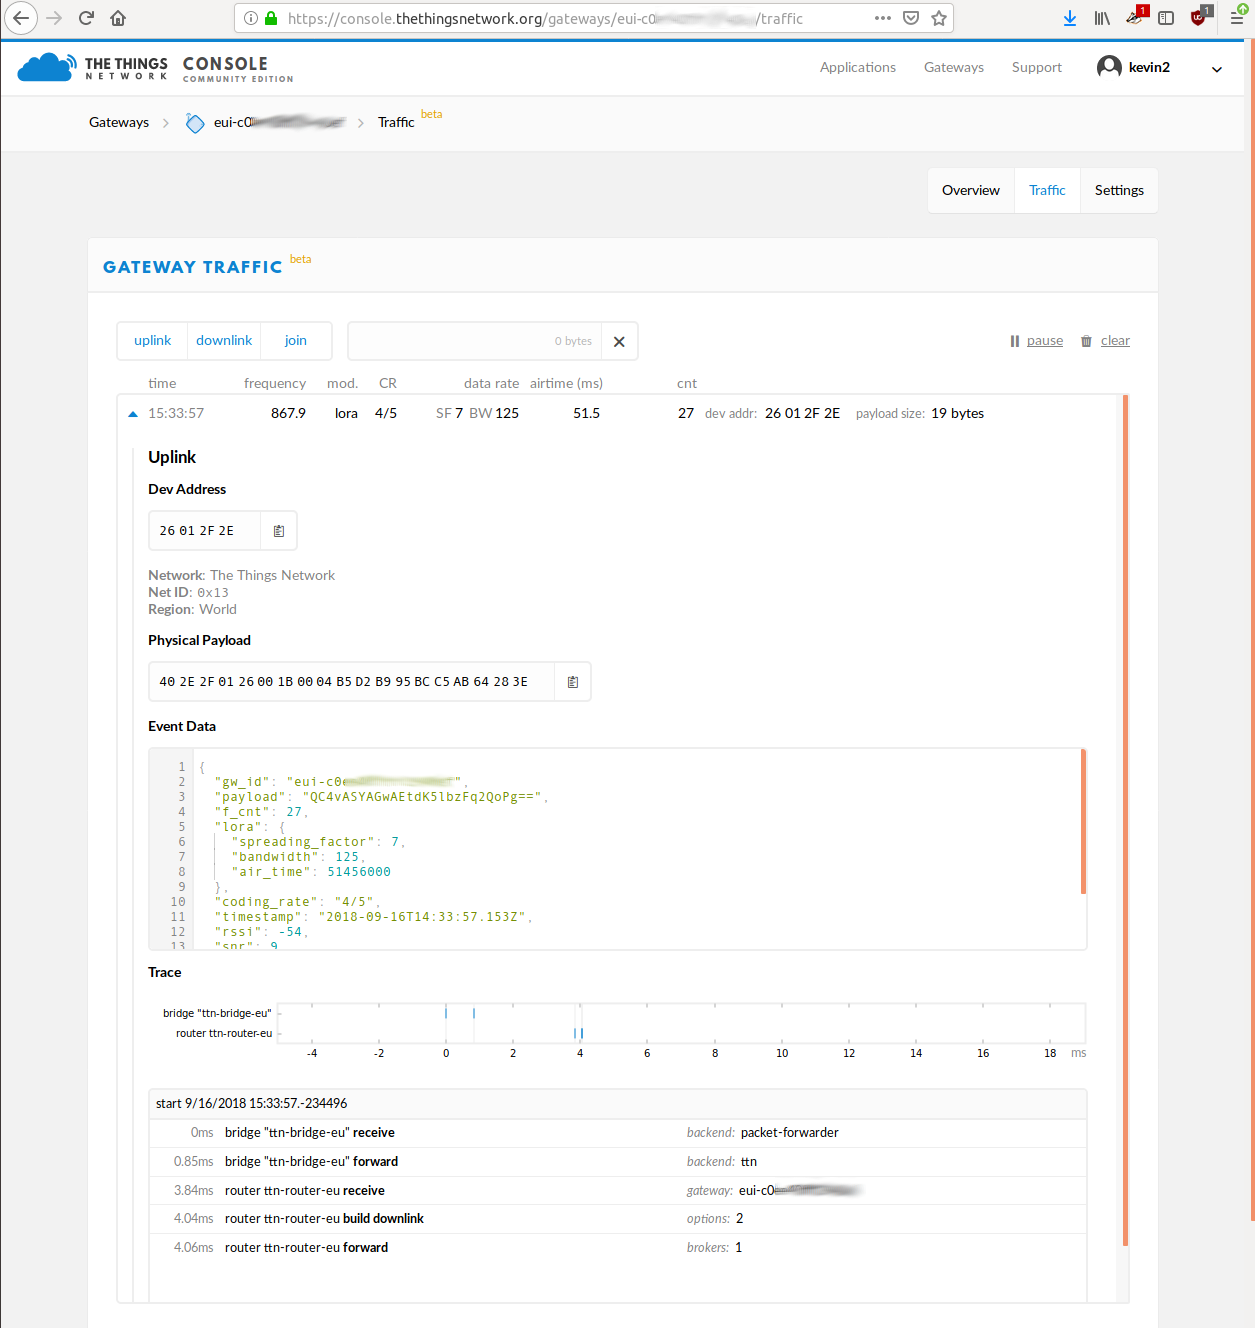
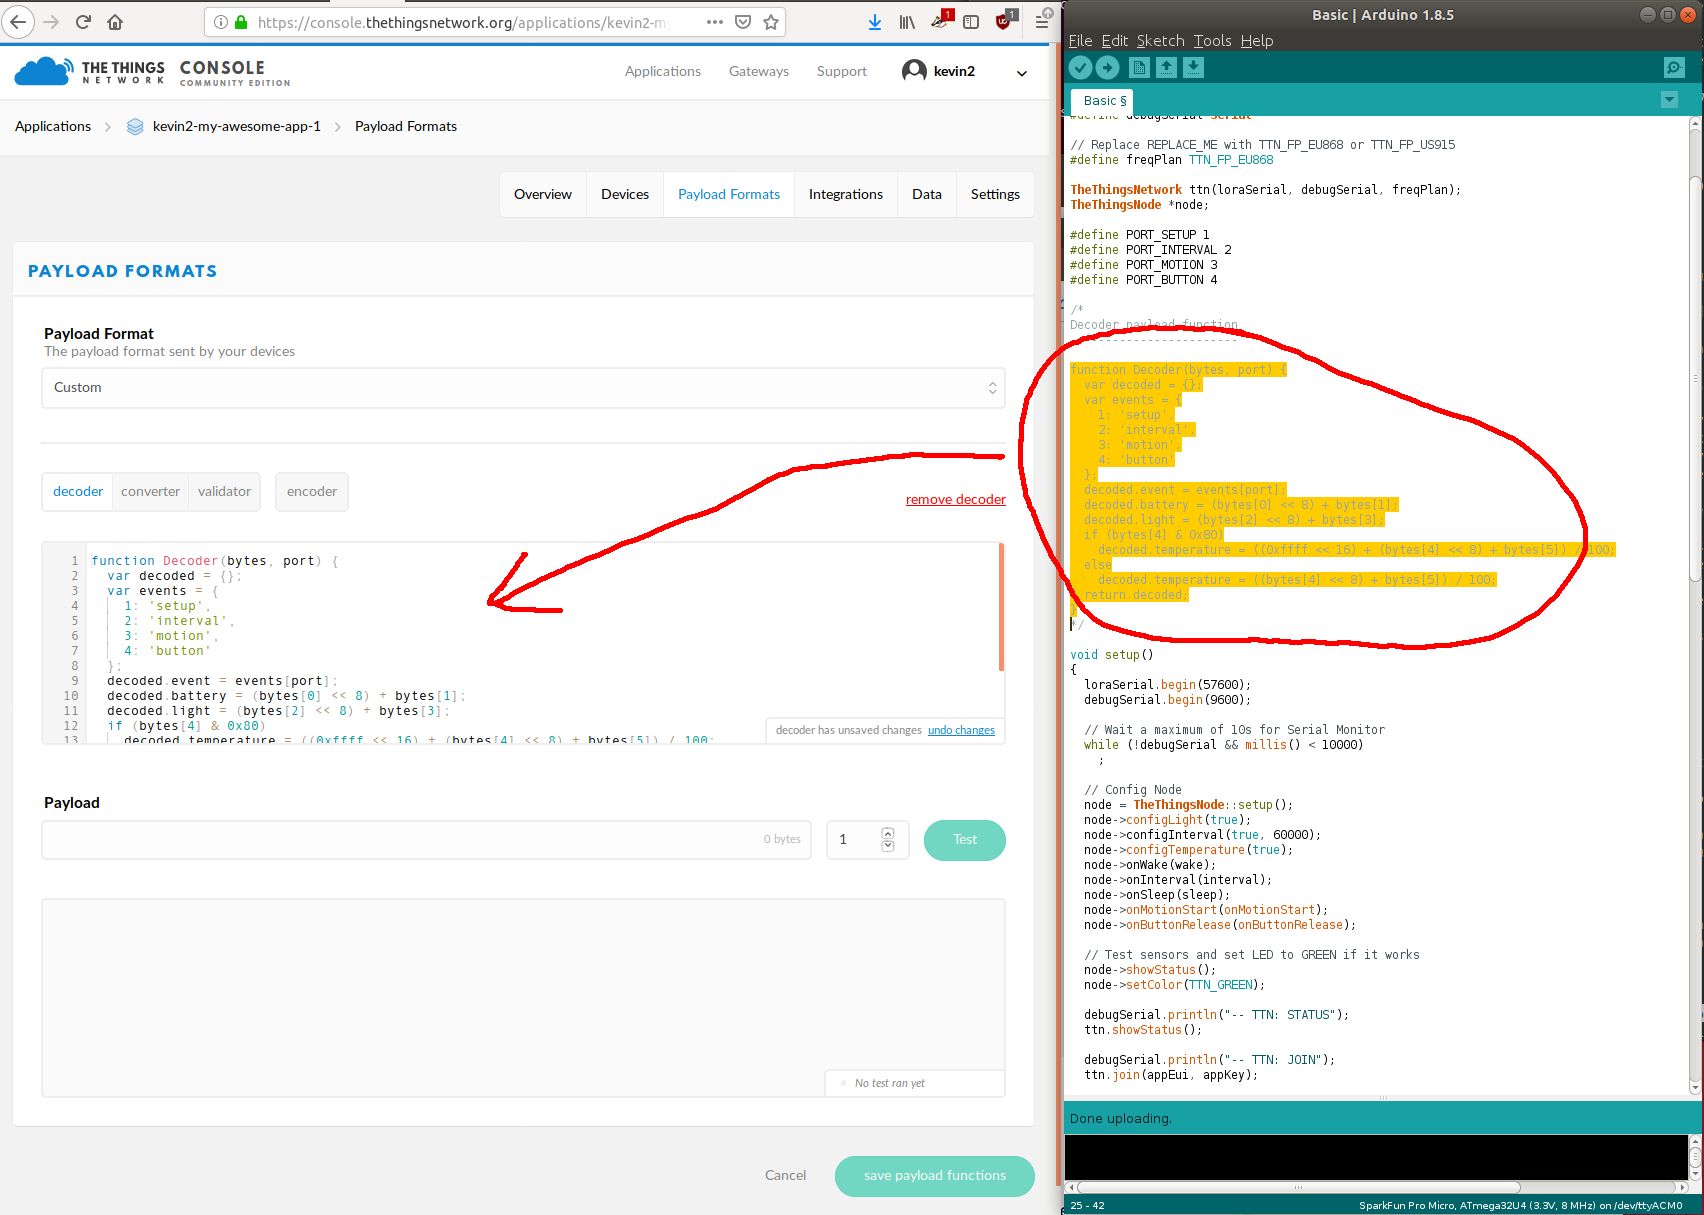
Note that the gateway can’t see the original payload, as it’s encrypted with the keys you embedded earlier. The decrypted payload is available in the “Application” screen, but it is not yet decoded into a sensible JSON payload. To do this, we need to embed a decoder into TTN which matches how the code in the Arduino IDE encoded the bytes to begin with. Since we used the example code from TTN, they handily embedded the decoder function into a comment in the Arduino code (this is what you should have observed earlier, although you didn’t do anything with it at the time).
The decoder is specific to a TTN application, so you need to go back to the application config “Overview” screen. Choose the “Payload Formats” tab from the top right of the screen, and make sure that the “Payload Format” is set to “Custom”. In the tabs below, make sure thta “decoder” is selected, and paste the code from the Arduino comment into the multi-line field.
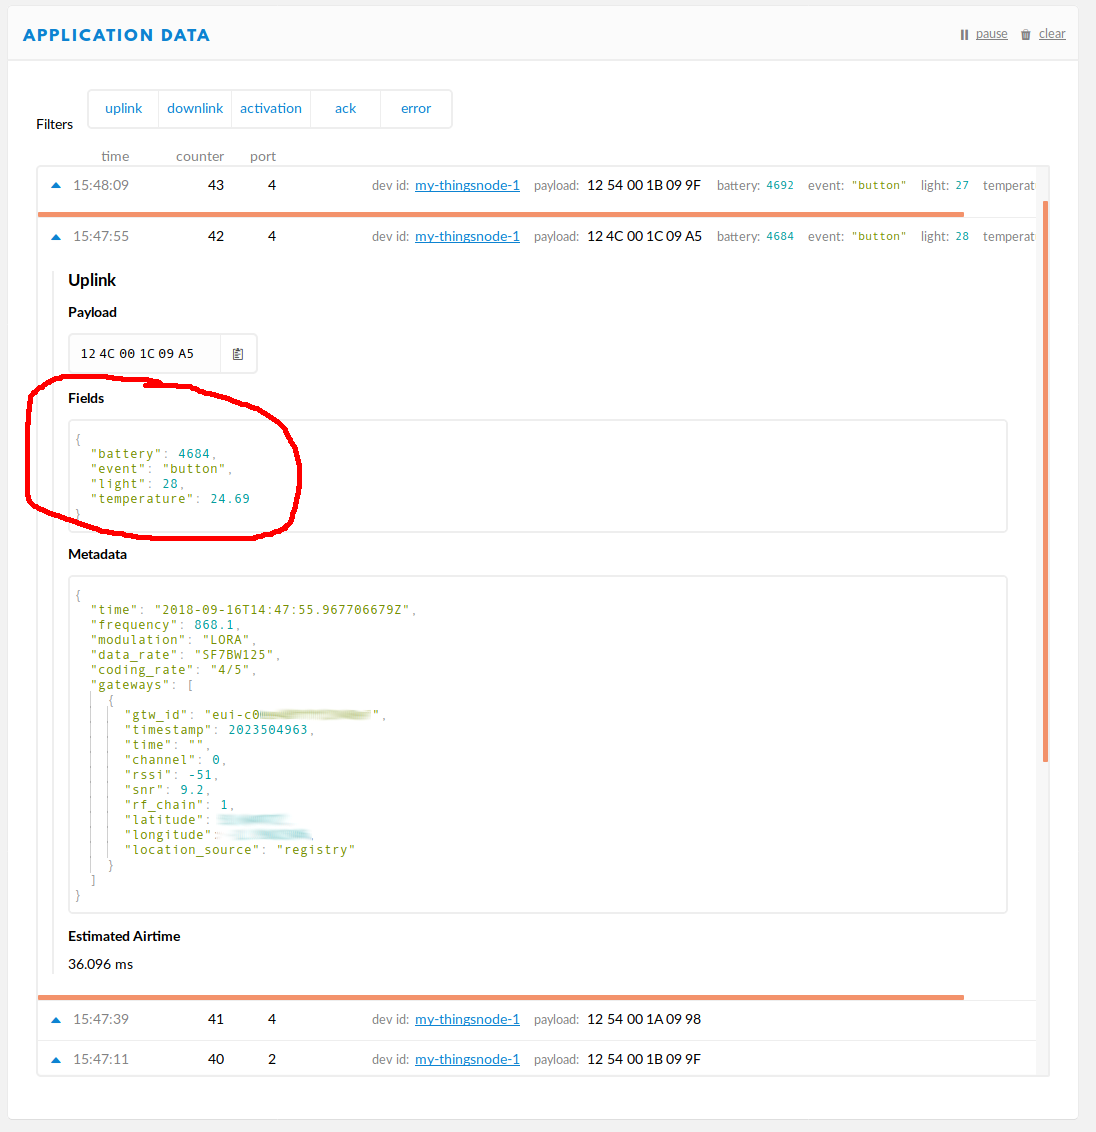
With this saved, you can go back to the application’s “Data” tab (or the device’s, it doesn’t matter, however the application’s tab will contain the data from all devices registered to this application). For any new packets which come in, you should see that the payload has been decoded into a “Fields” section which matches how the decoder code assembled a JSON object.
What next?
Happy that this was all working, I repeated it with the second Things Node, and left them in a couple of places around the house. I still haven’t decided what to use the button for; apparently ODI Leeds has one which they ask people to press every time they make a cup of tea so they can count how many cups have been made.
One of the projects related to TTN is TTN Mapper which is attempting to build a map of TTN gateways and what their effective range is. I decided that a nice thing to do next was to build a customised device which could send data to TTN Mapper, so I ordered a Seeeduino LoRaWAN w/GPS board and waited for it to turn up from China.
At this point, we went to EMF Camp and I was pondering what to do next. There was great LoRaWAN gateway coverage at EMF Camp, and also a relevant main stage talk by Alistair MacDonald. Although I didn’t get much from the talk, I was chatting afterwards with Alistair about potential use-cases, and I decided that the TTN Mapper project was definitely a good thing to do next.
There’s already a
kevin, which is possibly me from ages ago but if it was then I didn’t manage to guess which email address I’d’ve used to reset the password. It’s more likely to be someone else, though. ↩︎