LoRaWAN Things Nodes
Along with the LoRaWAN gateway, I also bought some nodes - 2 to be precise - which I could now start to play with given that my gateway was connected to TTN.
The nodes need some configuration (not least the LoRaWAN keys). More than that, they need some code - out of the box they are simply Arduino devices with some sensors and a LoRa radio. The overall instructions are at https://www.thethingsnetwork.org/docs/devices/node/quick-start.html; I started by following the steps at https://github.com/thethingsnetwork/arduino-device-lib to add the board to my local Arduino IDE1 via the library URL https://raw.githubusercontent.com/sparkfun/Arduino_Boards/master/IDE_Board_Manager/package_sparkfun_index.json.
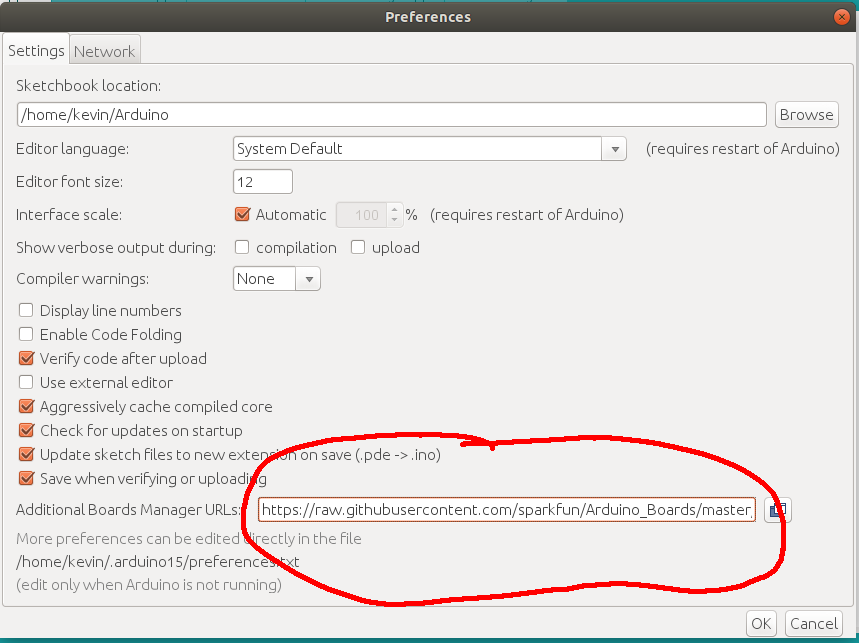
Note that this is functionality in a more recent version of Arduino than comes with Ubuntu (v1.0.5) - I had to download v1.8.5 from the Arduino website and run it from a local directory (which works fine).
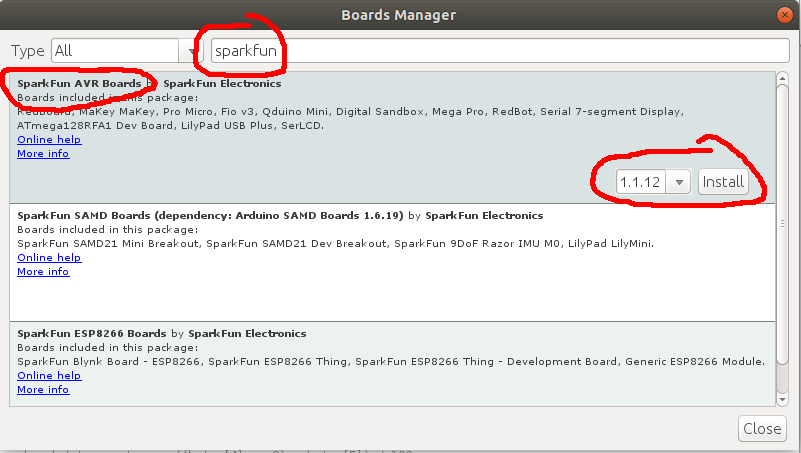
After you’ve done this, you need to get the Arduino IDE to download the actual board definitions. Go to Tools > Boards > Board manager… and search for “sparkfun”. Install the latest version of the “SparkFun AVR Boards”.
You also need to add the libraries for TheThingsNetwork and TheThingsNode. To do this, go to the menu Sketch > Include Library > Manage Libraries… and enter “thethings” into the search box.
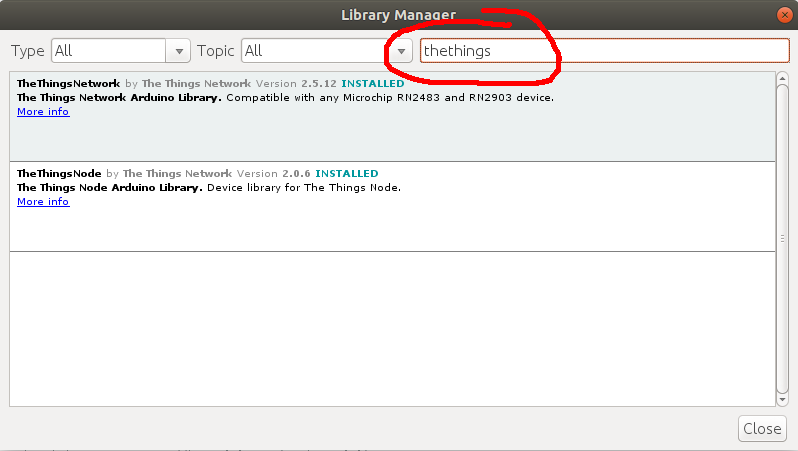
Then click on each of the two libraries and install the latest version of them.
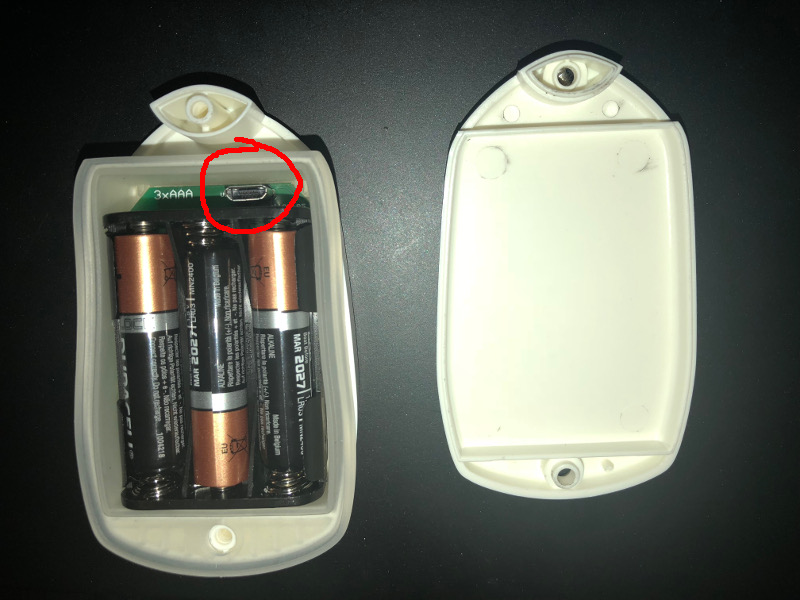
The next thing to do is to connect the device to your computer. This needs a micro USB cable, which plugs in just above where the batteries are (with or without batteries in, it doesn’t matter, although I had some problems getting the ThingsNode to properly reset after uploading new code when it had batteries in, so I’d advise removing a battery whilst reprogramming it). Some cables can be a bit of a squeeze, though, there’s not much room around the socket.
To setup the Arduino IDE to properly compile for the ThingsNode, you need to tell it which board and processor you’re using. Using the menus, choose Tools > Boards > SparkFun Pro Micro and Tools > Processor > ATmega32U4 (3.3V, 8MHz). You should also choose the serial port which the ThingsNode is attached to - it will have been magically created when you plugged-in the micro USB cable. For me, it’s /dev/ttyACM0. Choose this from the Tools > Ports menu. Note that if you unplug the ThingsNode, and then plug it in again, it will only get the same serial port assigned if nothing else is still using the serial port (the Arduino IDE’s serial monitor will hold the port open) - if this happens, then either choose the new port (which for me would be /dev/ttyACM1) or close whatever was still using the serial port before plugging the ThingsNode in again.
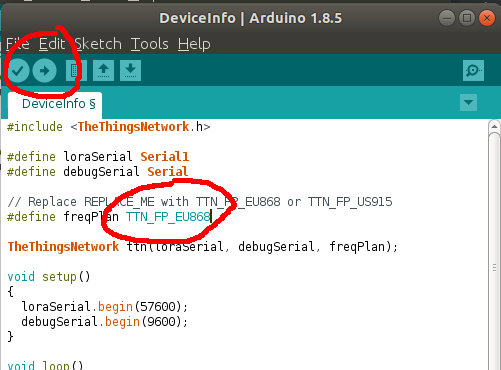
You should have a bunch of examples available in the menus at File > Examples > TheThingsNetwork. The first one to use is the “DeviceInfo” example, which will give you the crucial “EUI” which you will need to register the device for usage on TTN. Change the REPLACE_ME label with something copied from the line before (for me this was TTN_FP_EU868 as I’m in Europe, and here we use the 868MHz band for LoRaWAN stuff). You can then run the app on the Things Node by hitting the “Upload” button in the toolbar (if you just want to check the code without running it on the device, you can use “Verify” instead, but the “Upload” button will also verify the code).
If you have problems with the serial port, you need to check that your OS isn’t being “helpful” and assuming that the device you’ve plugged in is actually a modem and is trying to set it up as an Internet connection. Ubuntu does this by default. To stop it, you need to stop (and preferably disable) the ModemManager system service:
sudo systemctl stop ModemManager.service
sudo systemctl disable ModemManager.service
With the serial monitor open (ctrl-shift-M), and copy the EUI which it gives you.
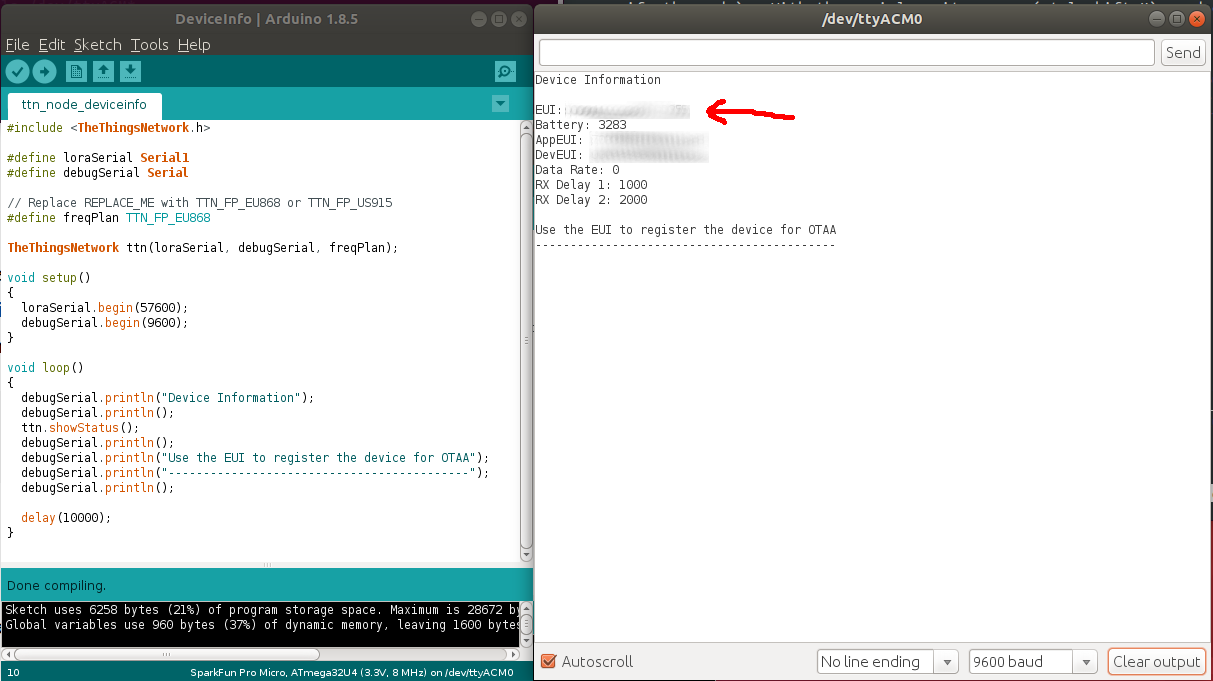
Now that you have the EUI, you can proceed to register the device at TTN and start having things talking to each other.
I must get a toolchain which is CLI-based, there’s a limit to how long I can put up with the Arduino IDE… ↩︎